
How To - Creating an Occasion
Follow the below steps to create a new booking occasion in the system:
-
First, go to the Occasions section.
-
Click the Add New button to create a new occasion.
-
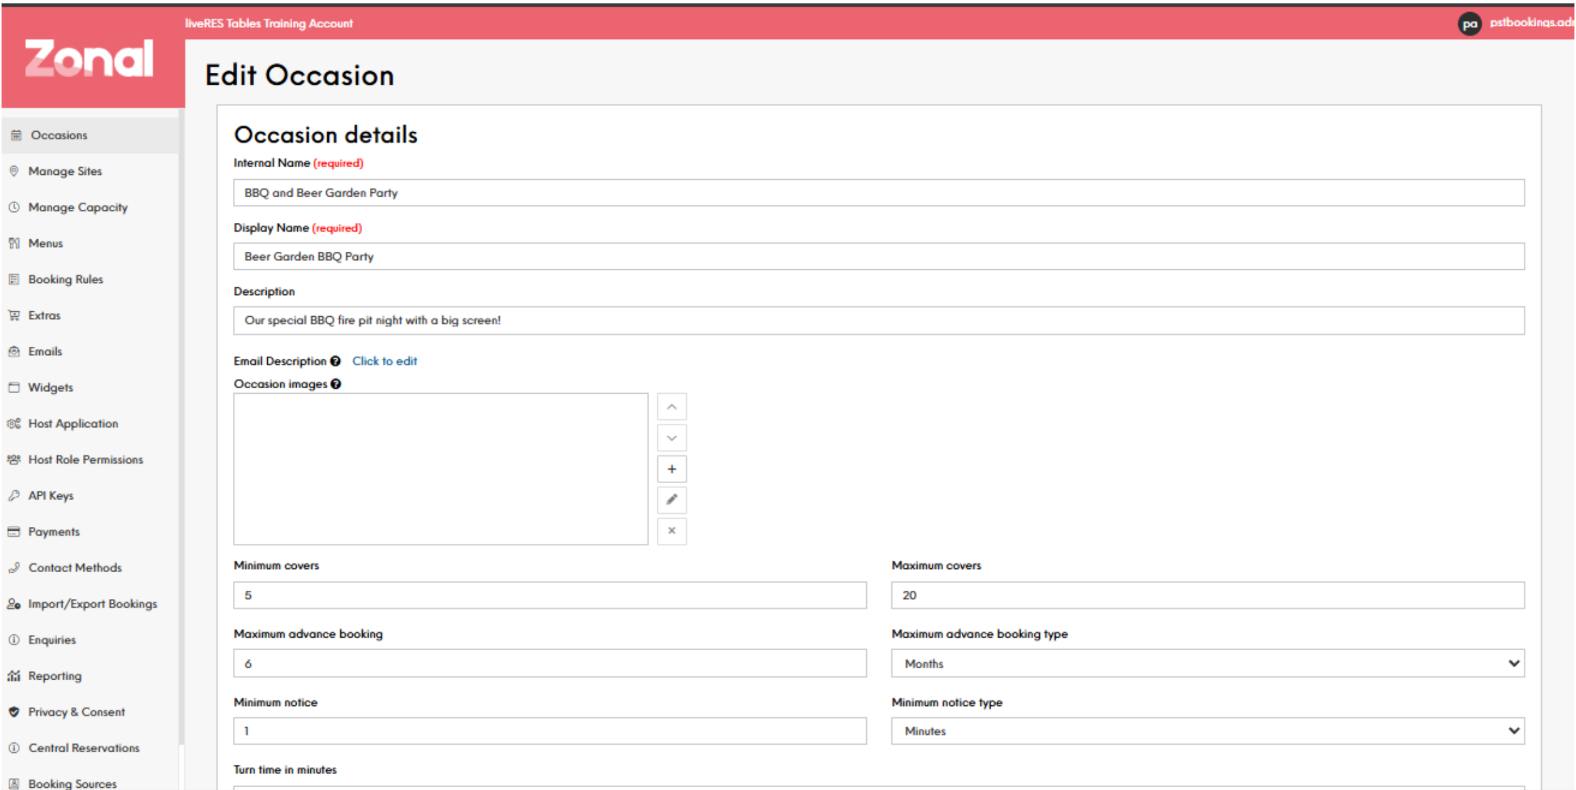
In the occasion details, enter:
-
An Internal Name (for your reference)
-
A Display Name (what the customer will see)
-
A Description (provide details about the occasion)
-
-
Set the Minimum and Maximum Covers (party size range)
-
Specify the Maximum Advance Booking time
-
Enter the Minimum Notice required to book this occasion
-
Next, in the Companies/Sites section:
-
Choose where this occasion will be available (company-wide or specific sites)
-
Select the booking channels this occasion can be booked through (e.g. online widget, API, host app)
-
-
In the Area Selection section:
-
Choose which areas the customer can pick from for this occasion (e.g. main dining room, private dining, outdoor terrace)
-
-
In the Menu section:
-
Decide if you want to make menus available for this occasion
-
Select the specific menus you want to include
-
-
In the Upsell Selection section:
-
Choose which upsells you want to make available (or exclude). This allows customers to add extras to their booking
-
-
In the Schedule section:
-
Set the date range and recurrence for when this occasion is available (e.g. daily, weekly, specific dates)
-
-
Save the new occasion.
Once created, this occasion will be available for customers to book through the selected channels, with the configured menus, areas, upsells, and other settings.
The key is to think about how you want to structure and present different booking types to your customers. The occasion settings allow you to tailor each option to match your business needs.